Email Verification Module Dashboard

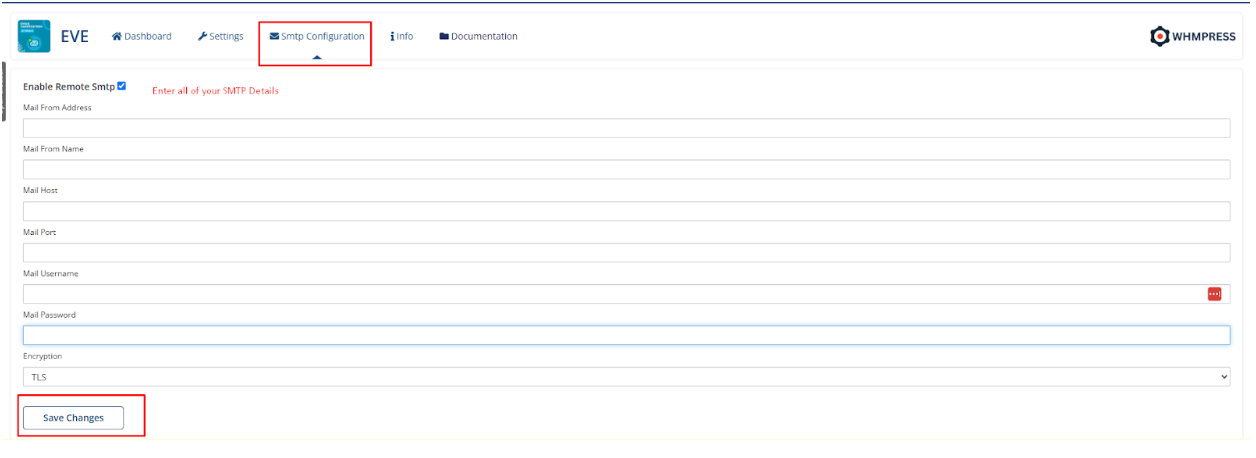
To configure SMTP, simply enable the Remote SMTP checkbox.
Next, complete all the required fields, select your preferred encryption method for sending emails, and click Save Changes.
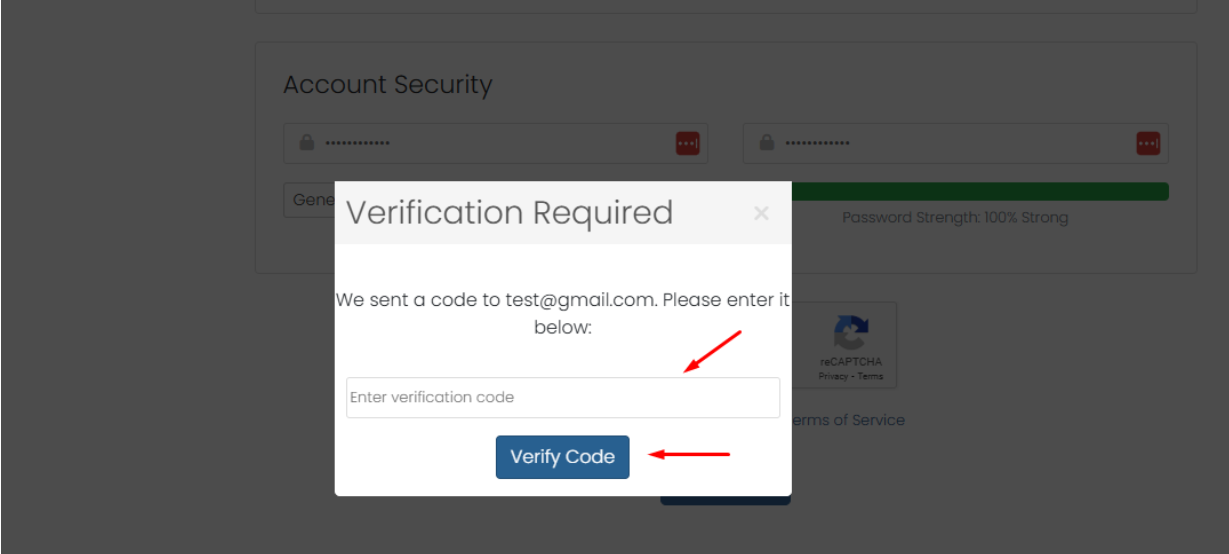
After configuring SMTP, navigate to your Client Area and register a new client by filling in all the required information. Ensure that you use a valid and active email address.
Upon registration, a verification code will be sent to the provided email address. Enter this code on the Verification page. Once the code is successfully verified, you will be logged in to your Client Area.
Conclusion:
Thank you for reviewing this document. If you have any questions or need further assistance, please feel free to reach out.
[ WHMPRESS.com ]
[ [email protected] ]